A Toolkit for Vertical Tangible User Interfaces
Publication: https://ieeexplore.ieee.org
This new TUI toolkit called TangiBoard and its new marker set enables the development of vertical TUI systems using technology and hardware already available in each classroom. Apart from reducing setup costs, time and technical expertise, TangiBoard facilitates system calibration and integration with existing TUI applications. This is enabled by a robust computer vision application that is able to run at real-time speeds while recognizing and tracking a contributed marker set using a regular web camera or a mobile device as the main camera.
This toolkit was evaluated in terms of ease of implementation, learning effectiveness and recognition performance with results in favor of the TangiBoard toolkit. Learning effectiveness experiments results clearly showed that by using this toolkit students were better able to understand the concept being taught when compared with traditional lecture delivery methods. Ease of implementation experiments concluded that participants with previous experience in TUIs also preferred using TangiBoard when it was directly compared with a popular toolkit they have previously used.
Any donations will be used to continue improving this toolkit and keep this page up and running.
Problems and Limitations of Current Toolkits used in Education
Based on literature research current TUI systems are mostly constructed in the form of a table where the graphics are projected underneath the table surface which is made of 8mm thick semi-translucent Perspex. Marker/fiducial symbols are then recognized using a camera underneath the table. The main problem with such an architecture is that students/researchers need to first build the table in order to start implementing the graphics and logic for the TUI system. Assuming the person has no experience in woodworking, the construction will take a big chunk of the time available to build the whole TUI system resulting in software bugs or unfinished system features. After the table is complete continuous maintenance such as camera/projector positioning and software calibration are constantly needed in order to keep using it. If the system was developed for education it will most likely end up in a dedicated room because of the big footprint it needs to operate, this will result in further problems, one of which is that only a small group of students at a time can use it. Moreover, due to the low viewing angles of the projection underneath the table surface and the space available around the TUI table, a limited number of students can observe or use it at the same time.
Solution
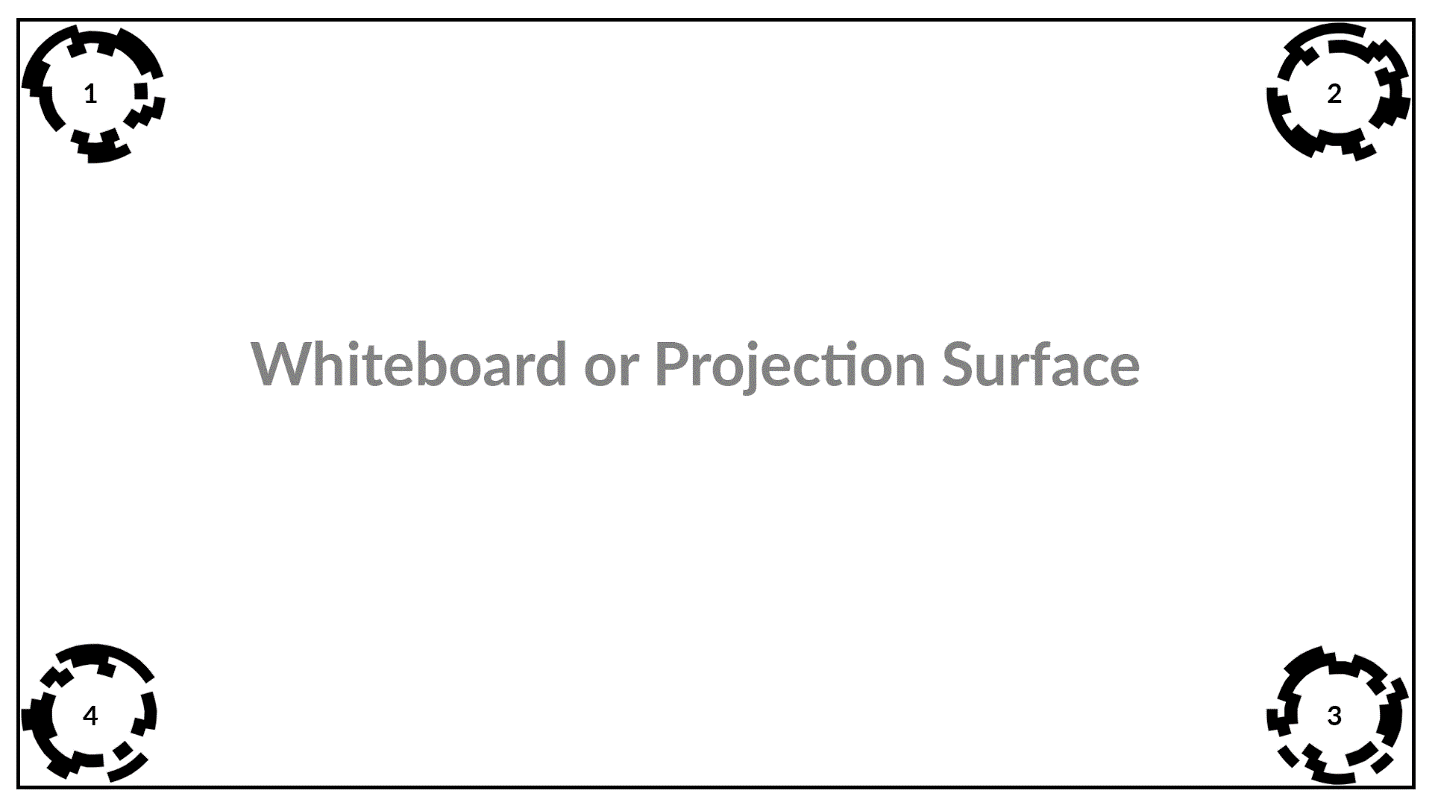
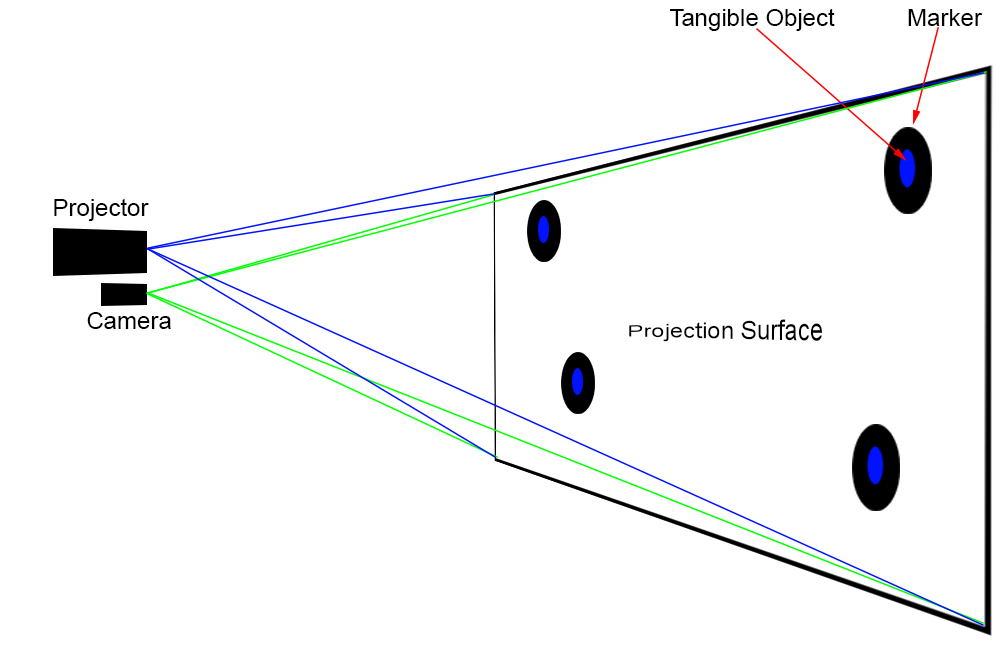
TangiBoard will make use of already available educational technologies and classroom configurations in order to set up a fully working TUI. By setting up a front-facing vertical TUI architecture, the system uses the already available magnetic whiteboard as the interactive TUI surface. This is illuminated with digital content and feedback information using a normal throw ceiling-mounted digital projector. Given that normal throw projector installations include a considerable throwing distance for digital projection, this will result in a large projection area. The TangiBoard architecture uses this advantage for a bigger interactive area. This allows the TangiBoard setup to make use of larger tangible objects and digital representations, hence facilitating visualization and interaction to a larger audience.
The detection and recognition of tangible objects is performed using a mid-ranged web camera, which is affixed under the projector. To facilitate the system setup, the TangiBoard toolkit will be able to utilize any digital CCD camera to provide TUI input feedback. To further reduce the financial and procurement expenses, TangiBoard is also able to integrate with most smartphone cameras on the market through Wi-Fi or a USB connection. A mobile device can run open-source video applications to either stream video via a Wi-Fi network or through a USB connection with the host machine executing the TUI software. This is made possible because indifferent to a tabletop architecture, no “wide-angle” camera lens is required to capture the complete interactive area because of the large distance between the whiteboard and the camera. Due to this large distance, in most cases the user will have to use the camera zoom to minimize the distance between the markers and the field of view border.
Interface Requriements
This toolkit is dependent on other systems in order to form a fully working TUI. It needs a real-time video feed from a camera in order to recognize marker rotation and location, then transmits those parameters to, for example, Unity which will, in turn, display various graphics depending on each marker position. The inter-process communication between the toolkit and the TUI must be compatible with the one used in a popular toolkit called Reactivision (Kaltenbrunner, 2009). By implementing the same communication procedure, all existing TUI implementations can be run using TangiBoard eliminating the need for a full TUI code revision.
Hardware Requirements
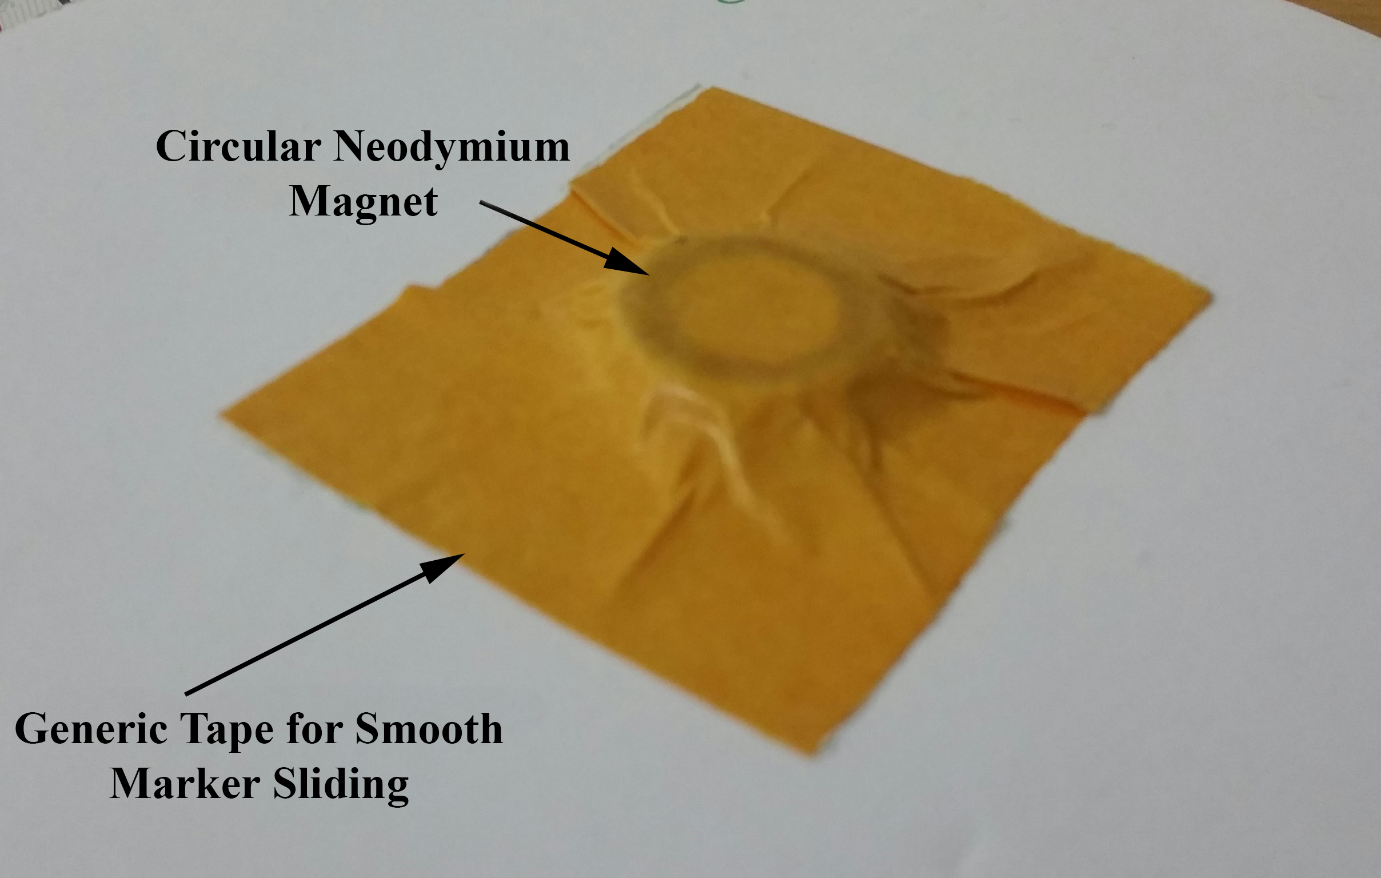
Hardware needed in order to use this toolkit includes; a projector, a magnetic whiteboard and a camera that can be replaced by a smartphone. In order to print the markers, a laser printer is preferred. For better TUI navigation, each marker has to be adhered to a circular base with a strong magnet underneath which will enable the user to stick the marker to the whiteboard.
Manual System Calibration
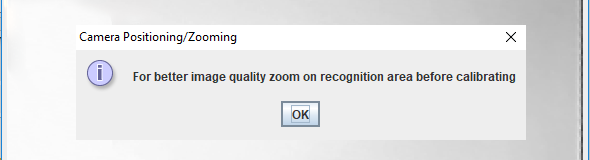
In order to get precise data from the system, a quick calibration needs to be completed before using it. This process can be done manually or automatically. The manual calibration involves placing the first four markers on the four corners of the projection screen. As illustrated below, the markers have to be placed in the correct order and orientation (all facing up) then by opening the camera options window the user can zoom on the projection surface for better recognition and finally click the calibrate button. The system then corrects the camera position and orientation, crops the image and corrects its perspective.
Automatic System Calibration
Instead of manually placing markers, the automatic calibration process projects the four markers on the selected screen in their respective position perfectly. The same calibration process is then used to correct camera position and field of view perspective. When the system detects that the calibration process was successful and is ready, the calibration screen is automatically removed and normal system execution is restored. Multiple monitors and projectors can be connected with a machine so a drop down menu was included in the GUI which is used to select the projection screen. To use the manual calibration method the user can click the "Calibration Screen: On" button to turn off the automatic calibration screen and instead use the manual calibration procedure.

Without zooming on the whiteboard, markers can still be recognized from a distance of approximately 3 meters. Some users may try to calibrate the system from this distance which will result in a small resolution detection area which will, in turn, decrease the recognition rate. When this occurs the user will be notified with a notification window. The user will still be able to complete the calibration procedure to encourage the completion of the project at hand.
Human Detection
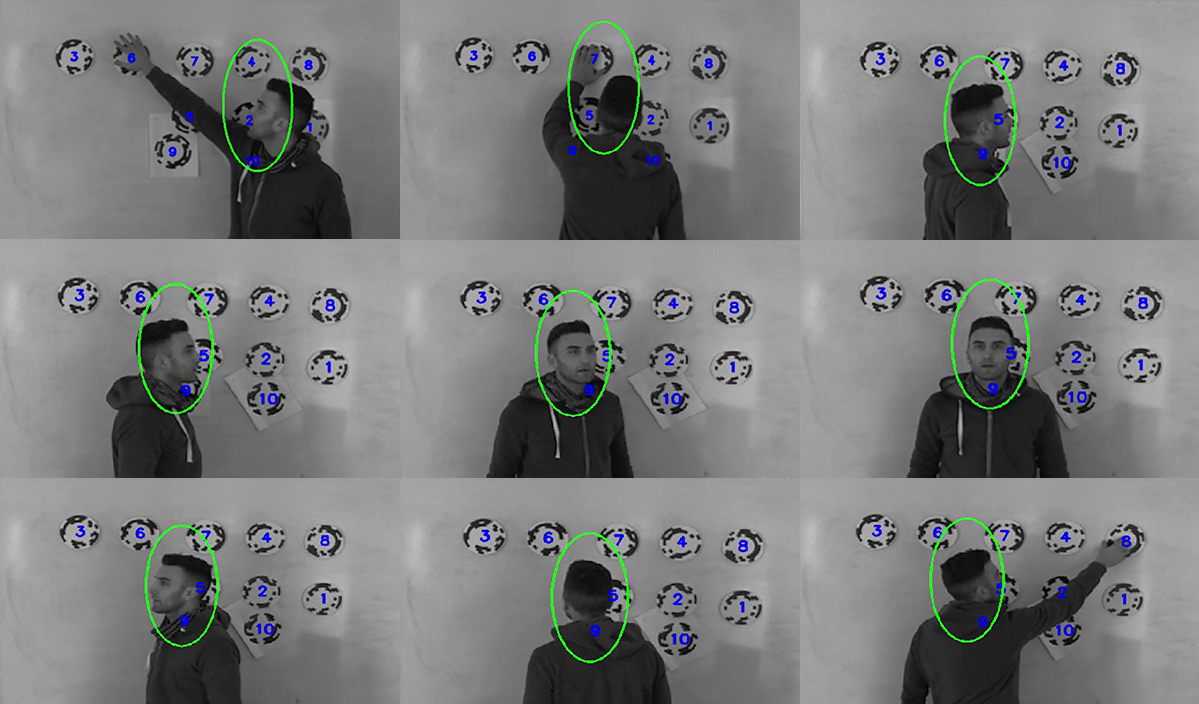
Given that this toolkit requires a person in front of the camera to move the markers and possibly give a lecture at the same time, some of the markers will get occluded by this person. If it was not planned during the design of a TUI, the TUI will most likely require a constant recognition of a particular marker in order to display the related graphics. If a marker gets occluded, the TUI will simply hide the graphics. In order to solve this issue, the system is able to detect a human, this way if a recognized marker is occluded while a human has been detected, the last processed values are kept until the marker is recognized again or the human is not detected. To compensate for lost detections between frames, a timer was set to keep the human detected for a predetermined amount of time when the detection is lost.
TangiBoard Marker Design
Publication: https://ieeexplore.ieee.org
Based on literature research most of the current marker designs do not allow the placement of a tangible object on top of them in a vertical TUI configuration, doing so will simply occlude a large part of the marker pattern. In contrast, current circular markers which may be used in this type of configuration are either too complex to be detected from the required distance while using a reasonable marker size or lack some important requirement such as rotation detection. This lead to the need of a new marker design in order to enable the placement of an object on top of it without interfering with the shape and texture of the tangible object itself. On the contrary, the design of the marker pattern needs to have enough space for the object while keeping the marker pattern fully visible from the front.
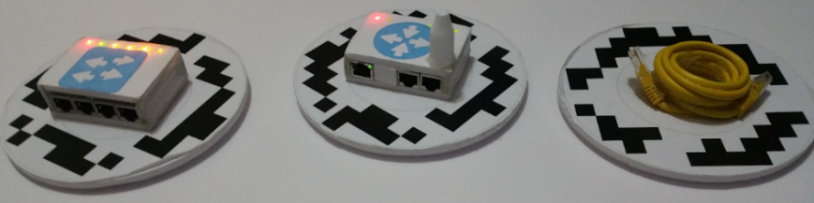
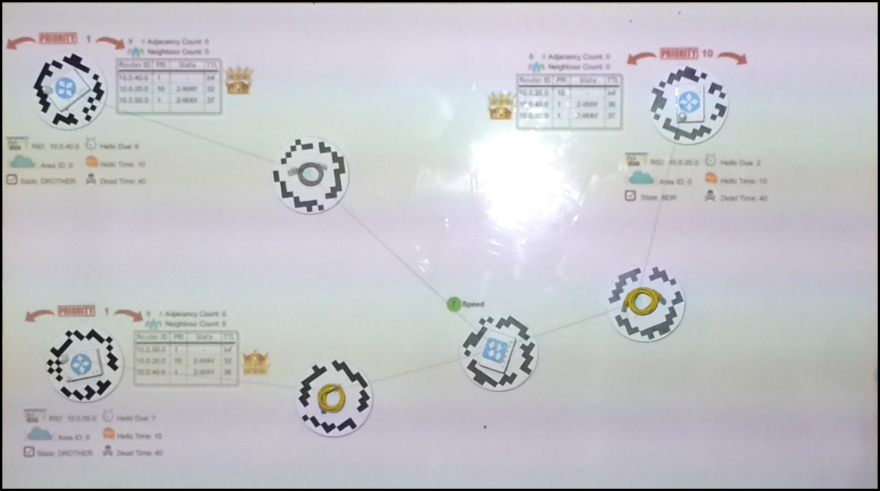
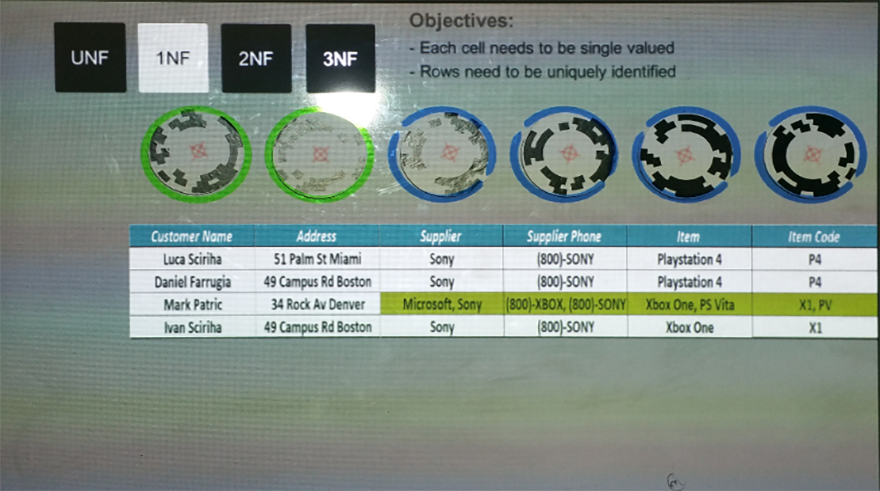
Below are some examples of vertical TUIs, the first image depicts a vertical TUI used to teach a networking concept called OSPF (Clifford De Raffaele et al.). The second image illustrates another vertical TUI which was developed to teach Data Normalization. Evaluation results showed that students were better able to understand the concepts using the vertical TUIs when compared with the traditional slideshow approach.
Recommended Hardware Implementations
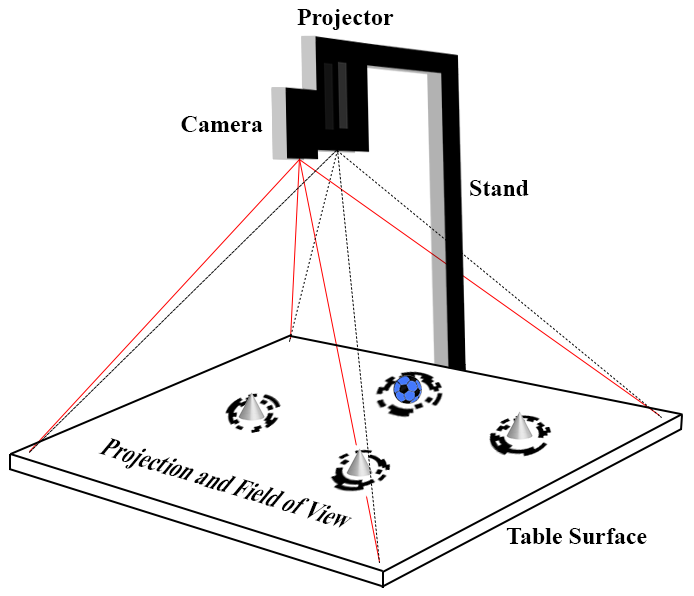
TangiBoard was specifically designed for the creation of vertical Tangible User Interfaces. This has various benefits, including; a bigger interactive area, a truly simple implementation procedure, a virtually non existent footprint and the bigger audience you can now reach with a Tangible User Interface. Having said that, TangiBoard can also be implemented in a horizontal configuration with the projector afixed on the top of a normal table. The two figures below depict the two tested configurations that can be achieved with TangiBoard.
Licensing
TangiBoard is a free software that can be used freely for private, academic and research purposes. The marker set provided can only be used in conjunction with the actual TangiBoard software only. Any other use of these markers is not permitted without a dedicated license!